Air conditioning systems often lose cooling performance gradually, which makes it easy to assume the compressor has failed. Weak airflow, inconsistent cooling, or warm air from the vents are frequently blamed on the compressor because it’s the most visible and expensive component in the system. In reality, many AC issues originate elsewhere and only appear to be compressor-related.
The AC compressor has a specific role: it pressurizes and circulates refrigerant. If it isn’t engaging, cycling correctly, or building pressure as designed, cooling will suffer. However, electrical faults, low refrigerant, pressure switch problems, airflow issues, or control system errors can produce nearly identical symptoms without the compressor itself being defective.
The explanation that follows outlines how to evaluate an AC compressor logically before replacing parts. It covers what observable signs matter, which checks can be done safely, how to interpret basic system behavior, and when professional testing is necessary. The focus is on accurate diagnosis—so money isn’t wasted on parts that aren’t actually the problem.
What the AC Compressor Actually Does (In Simple Words)
Before checking anything, it helps to understand the role of the compressor.
The AC compressor is the heart of your car’s air conditioning system. Its job is to:
- Pull in low-pressure refrigerant gas
- Compress it into high pressure
- Push it through the system so heat can be released
If the compressor doesn’t engage or can’t build pressure, the entire system fails to cool—no matter how good the other parts are.
But here’s the important part: the compressor depends on many other components. If any of them fail, the compressor may not turn on, even if it’s perfectly fine.
First Things to Check Before Touching the Compressor
Always start with the basics. This saves time and prevents wrong assumptions.
1. Confirm the AC Is Actually Turned On
It sounds obvious, but I’ve seen settings cause confusion:
- AC button pressed
- Fan running
- Temperature set to cold
If the fan works but air isn’t cold, then we dig deeper.
2. Check Cabin Airflow
If airflow is weak:
- The system may feel warm even if cooling works
- A blocked cabin filter can mimic AC failure
Strong airflow with warm air tells me the problem is in the cooling system, not the blower.
Step-by-Step: How to Check the AC Compressor
Now let’s get into the real inspection.
Step 1: Open the Hood and Locate the Compressor
The compressor is usually:
- Driven by the engine belt
- Mounted low on the engine
- Connected to metal AC lines
It has a pulley and clutch on the front.
Step 2: Visual Inspection (This Tells You a Lot)
Look for:
- Oil stains around the compressor
- Cracked or damaged wires
- Loose or broken connectors
- Bent or damaged AC lines
Oily residue often means refrigerant leakage, which can prevent the compressor from turning on.
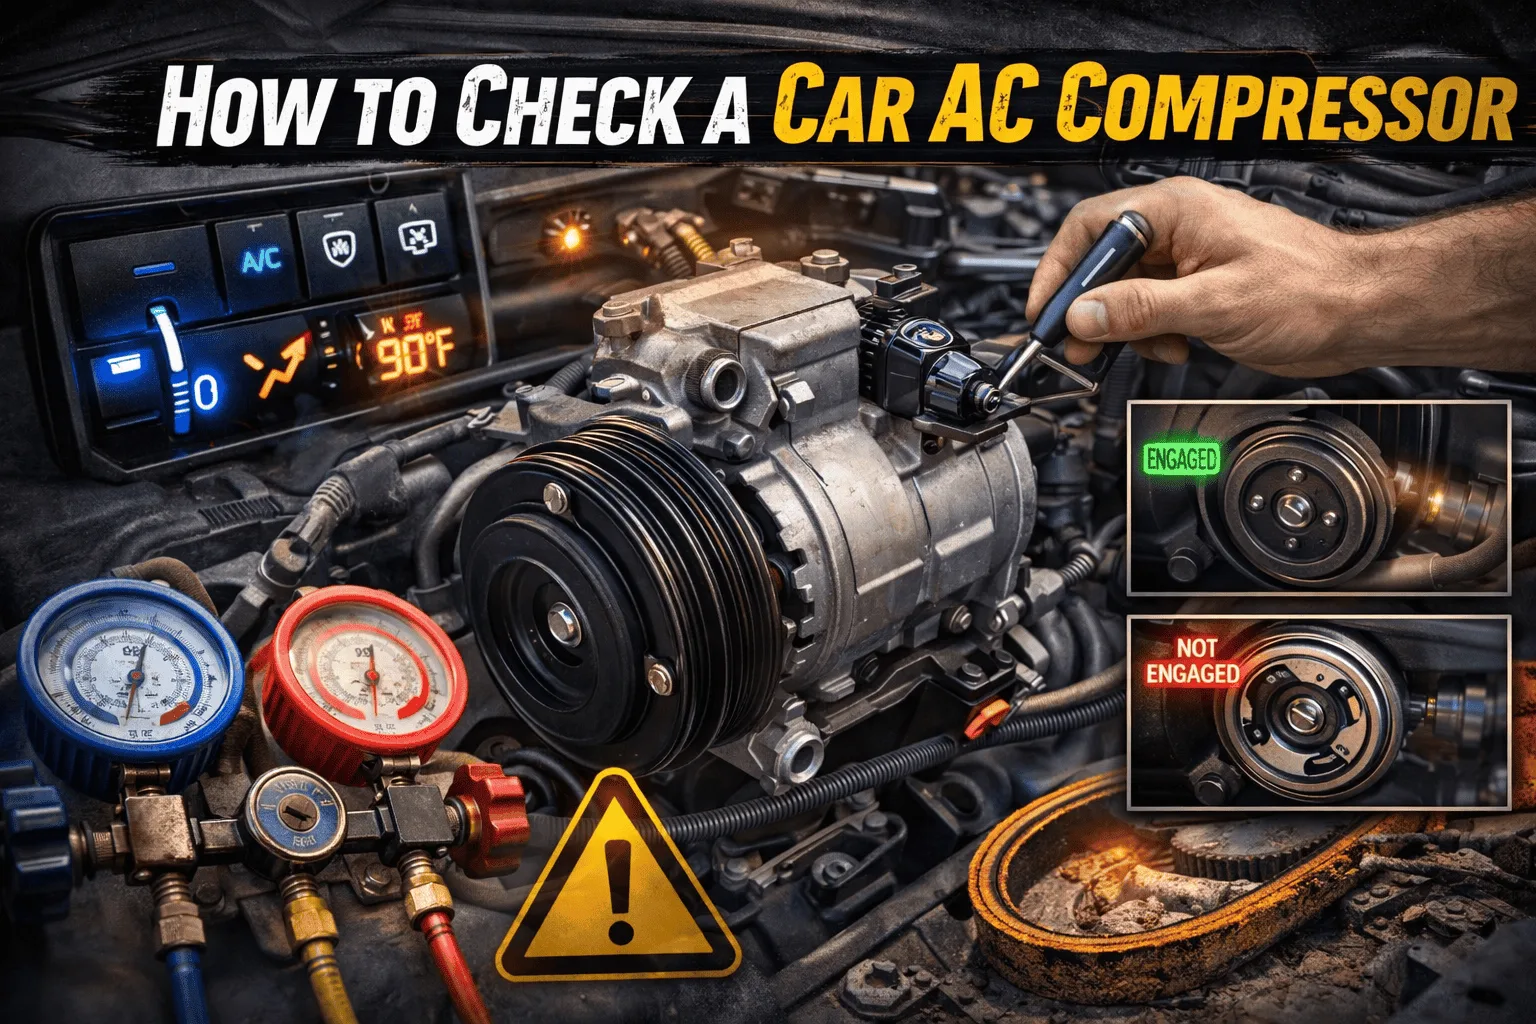
Step 3: Start the Engine and Turn AC On
This is the moment that reveals a lot.
With the engine running and AC set to max:
- Watch the compressor pulley
- The outer pulley always spins
- The inner clutch should engage and spin with it
If the clutch never engages, the compressor is not being activated.
What Different Compressor Behaviors Mean
Compressor Clutch Engages Normally
If the clutch engages:
- The compressor is at least working mechanically
- Cooling issues may be due to refrigerant level or airflow
This is a good sign.
Compressor Clutch Does Not Engage at All
This doesn’t automatically mean the compressor is bad.
Possible reasons:
- Low refrigerant
- Electrical issue
- Faulty relay or fuse
- Pressure sensor preventing engagement
This is very common.
Compressor Engages Then Disengages Quickly
This cycling behavior often means:
- Low refrigerant
- Overpressure condition
- Sensor input problem
Rapid on-off cycling stresses the system and needs attention.
Checking the AC Fuse and Relay (Always Do This)
Before blaming the compressor, always check:
- AC fuse
- Compressor clutch relay
A blown fuse or weak relay can stop the compressor completely while everything else appears normal.
Relays can sometimes fail intermittently, which causes inconsistent cooling.
How To Check for Low Refrigerant (Safely)
Low refrigerant is one of the most common reasons a compressor won’t engage.
Signs include:
- Compressor not turning on
- AC blowing warm
- No noticeable engine load when AC is on
If pressure drops too low, safety systems prevent compressor operation to avoid damage.
Don’t vent refrigerant or open lines. only:
- Observe system behavior
- Use proper gauges if available
If you don’t have gauges, this step is best left to a professional.
Listening to the Compressor (Sound Tells a Story)
\Always listen closely.
Healthy sounds:
- Soft click when clutch engages
- Steady hum while running
Problem sounds:
- Grinding or squealing
- Loud knocking
- Metallic scraping
Strange noises often mean internal damage, which is serious.
Checking the AC Belt and Pulley
A compressor can’t run properly without a healthy belt.
You should inspect:
- Belt tension
- Cracks or glazing
- Pulley alignment
A slipping belt can prevent the compressor from reaching proper speed.
Electrical Checks (Basic and Safe)
Without advanced tools, stick to simple checks:
- Connector firmly attached
- No broken insulation
- No corrosion
If the compressor clutch never engages, power may not be reaching it.
Electrical problems are more common than people think.
When the Compressor Is Probably Not the Problem
In my experience, many compressors get replaced unnecessarily.
Often the real issue is:
- Low refrigerant from a slow leak
- Faulty pressure sensor
- Control module logic
- Relay failure
That’s why testing matters.
Signs the Compressor Itself Is Failing
Sometimes, though, the compressor truly is the issue.
Clear warning signs include:
- Loud mechanical noise
- Seized pulley
- Clutch engages but no cooling at all
- Metal debris in the system
At this point, replacement is usually unavoidable.
Why Guessing Can Cost You Big Money
An AC compressor is one of the most expensive components in the system.
Replacing it unnecessarily can lead to:
- High repair bills
- Repeated failures
- System contamination
I’ve seen cases where the compressor was replaced, but the original issue remained.
Diagnosis always comes first.
When to Stop DIY and Call a Professional
I’m honest about limits.
Seek professional help when:
- Refrigerant recovery is needed
- Internal compressor damage is suspected
- Electrical diagnostics go beyond basics
A proper AC diagnosis includes pressure readings, system analysis, and leak detection.
How I Prevent Compressor Problems
Prevention is easier than repair.
What do now:
- Run AC regularly, even in winter
- Fix leaks early
- Replace cabin filter on time
- Don’t ignore weak cooling
Compressors last longer when they’re used and maintained.
Common Myths About AC Compressors
Let’s clear a few things up.
- “No cold air means bad compressor” — Not always
- “If clutch doesn’t engage, compressor is dead” — Often false
- “Adding refrigerant fixes everything” — Sometimes dangerous
Understanding saves money.
Final Thoughts
Checking an AC compressor doesn’t require panic or guesswork. It requires patience, observation, and logic. Over the years, I’ve learned that the compressor is often blamed unfairly, while the real problem hides elsewhere.
By following a step-by-step approach—watching, listening, and checking simple things first—you can avoid unnecessary repairs and understand what your car is truly telling you.
If your AC isn’t cooling, don’t rush. Take a breath, check the basics, and work your way forward. Whether you fix it yourself or take it to a technician, you’ll do so informed and confident.